Thursday, April 22, 2010

Yellow Rice "Something", Accompanied By the Worst Pictures of Food Ever

Last night I got home from the gym, thinking I had about 2 hours before I had to leave for choir practice. I started some onions cooking before I even really decided what I wanted to do with them, and then happened to glance at my email and see that Plans Had Changed - I had exactly 65 minutes. So I started grabbing things out of the fridge and pantry, chopping them with wild abandon before flinging them in the pot. The results were surprisingly tasty, but I have to say that's more a result of Mahatma's Yellow Saffron Rice (free, thank you Publix!) than anything else.

So first thing's first: I had about 3 onions left from last week's CSA box, so those were the first to go in the pot with a good glug of olive oil, ready to soften to my heart's content.


I grabbed a half of bell pepper out of the fridge and a handful of shredded carrots and threw them in.


After those sweated away for a few minutes, I dumped in the Yellow Rice mix and 3 cups of chicken stock (that were in my fridge, waiting to be frozen, until my laziness took too long and thus had to use it for something edible).

Then I forgot to take a picture and jumped in the shower.

When I got out, I grabbed a leftover hamburger patty out of the fridge and chopped it up because The Professor was not happy about the lack of meat in my Pot of Dinner.


Then I found an ounce or 2 of mozzarella - the real stuff, not the part-skim I usually buy, in my fridge and decided to chop it up and throw it in to add some creaminess.


After I let that melt for a minute or two, I plated it up and had the fancy thought of cutting some fresh chives for a garnish.


Why I thought this deserved a garnish, I'll never know. I do know that it actually tasked quite yummy and made excellent leftovers for lunch today. And that counts as a Total Win.

Saturday, April 17, 2010

Happy National Cheeseball Day!

So. It's National Cheeseball Day. How did you celebrate?

The Bestest Friend and I celebrated with a cheeseball, of course.


Then we had a cookout - burgers, to be precise.


That's my burger: Hamburger with spinach, tomato, mozzarella cheese, roasted bell pepper and grilled portabello mushroom on a toasted bun.

That's the BFF's burger: Veggie burger with A1, ketchup, mustard, mozzarella cheese, spinach, grilled portabello mushrooms, roasted bell pepper and tomato on a grilled bun.

Do we know how to celebrate or what?

Sunday, April 11, 2010

Spanish Rice, Easy or EASIEST - Your Choice

Two for one special this time, Kittens! I've got this Spanish Rice recipe that I love, love, love (cumin + chili powder = lovex3). I make it for the now-annual Superbowl Taco Party. The first time I made it for the party I was time crunched and I wondered if there was a way to make the easy recipe even easier, and guess what - there is! And better yet, it only has one step. Even better yet, it still tastes awesome. My only problem tonight is that I'm out of cheese. And cheese makes everything Better than Best.

This is pretty forgiving - I've used no stock and all water without much flavor difference. Regular paprika works well too, although I'm partial to the smoked variety. And some hot sauce tossed in can kick it up a notch or five.


Easy Spanish Rice 1 tbsp canola oil
1 small onion, diced
1 red bell pepper, diced
2 garlic cloves, minced
1 can (14.5 oz) diced tomatoes, undrained
3/4 cup rice
3/4 cup chicken stock
3/4 cup water
2 tbsp cumin
1 tsp smoked paprika


Saute the onion, pepper and cloves in the canola oil until soft, about 3-4 minutes. Add the tomatoes, rice, stock, water, cumin & paprika. Bring to a rapid boil, then reduce to a simmer. Cover and cook for 30 minutes, or until rice is done.


Easiest Spanish Rice:

Omit oil, onion, bell pepper & Garlic. Add the remaining ingredients to a pot along with a teaspoon of garlic powder and a half teaspoon of onion powder. Bring to a rapid boil, then reduce to a simmer. Cover and cook for 30 minutes, or until rice
is done.

Thursday, February 18, 2010

Stuffed Focaccia

Last weekend, thanks to some snow and a federal holiday, I got an unexpected 4 day weekend.

Not being one to waste such an opportunity, I spent Friday doing absolutely nothing. Well, I went to the gym while it snowed. Then went out to eat. And then I came home and sat on my couch through about 6 hours of mostly-crappy movies. The couch had sucked me in, though, and I couldn't escape.

Sunday, The Best Friend came over for lunch and about 9 hours of almost do-nothing-ness. Except for one thing: we were idly paging through cookbooks and found a recipe for focaccia bread. Which we agreed that we had to make immediately. And by "we had to make" I mean "she drank wine and watched me knead dough".

From start to finish it took a couple of hours. But dinner that night was some wonderful focaccia bread, stuffed with feta and oregano, topped with kosher salt and rosemary. It was ok the next night heated up with dinner, but this is one bread that must be eaten straight from the oven. Which will burn off half of your taste buds, but the remaining ones are so happy, that they gladly survive the sacrifice.


Stuffed Focaccia
Original recipe - which I didn't follow much past the actual dough - from "Bread" by Eric Treuille.

Ingredients:

For the dough:
  • 2 tsp dry yeast
  • 1 1/4 cups water
  • 3 1/2 cups bread flour
  • 1 1/2 tsp salt
  • olive oil
For the filling:
  • 8? oz feta, crumbled
  • small handful of fresh oregano
For the topping:
  • 4 Tbsp? olive oil
  • 1 tsp? kosher salt
  • 2 Tbsp? fresh rosemary

First, the dough:

Dissolve the yeast in warm water and let stand for five minutes. The original recipe called for 2 tsp of yeast, but mine was kind of on the old side so I used 3 - which was unnecessary, as this made it rise higher than real focaccia bread should rise. So you can go ahead and kick me out of the "Real Focaccia Bread Makers" club.

Put the flour in a large bowl and combine with the salt. Make a well in the middle, pour the yeast/water in the center and stir with a wooden spoon - I ended up using my hands - until combined.

Flour your kneading surface, and knead for about 5 minutes, until it's elastic-y.

Place in an oiled bowl, turning to coat, cover it with a warm cloth and let rise until doubled. I turned my oven on while I was mixing the dough; when the dough was done, I turned it off and set it on top of the stove, so mine rose in about 30 minutes. Is this cheating? I don't care.

Punch the dough down and divide into 2 equal pieces. Chafe* for 5 minutes, then let it alone for a bout 10.

Roll one piece of dough out - I'm supposed to give measurements, but I didn't take any. I just went on the fly. The recipe says "9 1/2 inch rounds", but mine was more oblong and I just eyeballed it.

Sprinkle the cheese crumbles over the dough - I probably used between 8 & 10 ounces of a block of feta, crumbled up.

Sprinkle fresh oregano leaves over the whole she-bang. Again, no measurements, I just kept pulling oregano leaves off the stems until I thought it looked good.


Roll out the 2nd round to a shape as close as possible to the first, and lay over the top.

Preheat your oven to 400.

Use your finger to make many, many indentations across the surface of the dough, about 1/2 inch deep - this was the step the Best Friend handled, while I stripped rosemary stems.

Poke pieces of rosemary into the top of the dough. When I was eating it, I thought the rosemary was the one of the best parts and wished we had put more on it.

Sprinkle the olive oil across the top of the dough. I probably used more than 4 tablespoons - we wanted to make sure a little got in every indentation.


Sprinkle the kosher salt across the top.

Bake at 400 for about 40-45 minutes, or until golden brown across the top. Eat while still warm and gooey in the middle.


Notes: Chafing dough: *"to gently turn the risen ball of dough tucking in the lower edge as you go. Turn the dough around fully three or four times. What this does is pull the top of the dough out, and pushes it in at the bottom. If done right it essentially pulls the dough around in on itself to even things out." -- from here.

I didn't do a whole lot of measuring on this one, because measuring fresh herbs for this would have been a pain, and I would have had to remove the wine glass from one hand. The amounts in the ingredients list is what's listed in the original recipe, although I used some different cheese and herbs. I think I could have definitely used more oregano, a little more feta and maybe some more rosemary. But that might have resulted in a bread so awesome that I would spend the rest of my life eating it...so maybe it's a good thing I didn't go overboard.

Monday, February 1, 2010

Greek-Inspired Lamb

This weekend, I had a hankering for lamb. Not sure if "hankering" is appropriate when speaking of dead baby animals, because I most assuredly did not want a live one. And I was planning on inviting a friend over that might - just might - out-hanker me in the lamb department, and let me tell you, that is not easy. The highlight of the upcoming trip to Ireland will be the availability of my meat of choice.

So, I've been cooking a lot of Indian-flavored dishes lately and decided to branch out. All the way to Greece. The problem was that I couldn't settle on one recipe. So I took bits and pieces of several and went my own way.

As I told my sister on IM "if I use olive oil, lemon juice & oregano with my lamb, I can just call it Greek".

And that, friends, is the rest of the story.

Greek Inspired Lamb

1 lb lamb, cut into 1"(ish) cubes
1/4 cup balsamic vinegar
1/4 cup red wine
2 Tbsp extra virgin olive oil
2 Tbsp fresh oregano
5 cloves garlic, minced
1 14 oz can diced tomatoes
1 14 oz can artichoke hearts, drained and cut in half lengthwise
feta cheese

Mix together in a bowl: vinegar, wine, oil, oregano & garlic.


Pour over lamb and stir. Marinate at room temperature for 1 hour, or in the fridge for ...let's say 2? 3?


Pour the whole she-bang into a large skillet and cook for about 10 minutes, moving the lamb around to ensure it's cooking evenly.


Add the tomatoes and bring back to a simmer for about 5 minutes.

Add the artichoke hearts and bring back to a simmer for another 5 minutes.


Serve over brown rice, couscous, etc. and garnish with feta cheese.


MAJOR Note:I was cooking this ahead of time, so when we all returned to the house from a meeting I could just pop it on the stove and heat it up while I cooked some couscous. I tasted it after the tomatoes were added and it was acidic. I freaked out a little bit, and thought "what the hell, I've got a frozen pizza" (discovered later that I didn't, actually) and just added the artichoke hearts and pulled it all off the heat to shove in the fridge.

When I got home, I reheated it as planned - and it was wonderful. Amazingly good. If I try this again - and I probably will, at some point - I might have to play around to figure out how to get the effect without 2 hours of refrigeration.

Saturday, January 23, 2010

Zanzibar Mahi, An Adventure

Remember That Cookbook Thing? It was a couple of years ago, but some bloggers around these here 'nets got together and we reviewed an awesome cookbook called "Where Flavor was Born" by Andreas Viestad.* Well, I hadn't pulled it out in a while, and today I was in the mood for fish so I dug it out of a box and flipped through to see what wonders the people around the Indian Ocean can do with a fish fillet.

I had gone to the store for swordfish, but my choices were Mahi Mahi or Tilapia. Which is the same thing as having no choice, because The Professor hates Tilapia to the very marrow of his bones. Since this recipe is basically just some cooked fish with a delectible relish** on top, I figured Mahi would work. The original recipe called for Kingfish, so the author needs to be glad I even stayed with the correct protein at this point.

Hmm. I wonder how this sauce would be in a baked chicken recipe...

*Hey, I think I'm supposed to make sure you know that I was given this cookbook (back in 2008) by the publisher to review it. I finished my part of that deal almost 2 years ago, but the last thing I need is some anti-blogger fed blowing up my blog. So yeah. It was free. I kinda liked that part.

**I don't know what this substance actually was. I was expecting a sauce, but I must have cooked it down too much. Doesn't matter, it was awesomely awesome.

***Oh, also, the name of this in the cookbook is "Kingfish with Oranges, Cloves & Ginger", but that just gives too much away, and you wouldn't even need to read the recipe if I named it that. And the book names from where the recipe hails. Thus, Zanzibar Mahi.


Ingredients:
  • 2 8oz Mahi fillets
  • 1/2 tsp ground ginger
  • 1/8 tsp ground cloves
  • 1 whole clove
  • 1 1/2+ tsp grated orange zest
  • 2 Tbsp canola oil, divided
  • 1 small yellow onion, diced
  • 1/2 cup orange juice (I juiced the orange I zested, and it was perfect)
  • 1 tsp fresh ginger, chopped very fine
  • 1 tbsp brown sugar, divided
  • salt & pepper to taste

Directions:
In a small bowl, mix together the ground ginger, ground cloves and half of the orange zest.

They really need to find a way to add scent to blog posts

Heat 1 Tbsp oil in a small pot and saute onion until it has softened, about 2 minutes.

Add the orange juice, fresh ginger, whole clove, half of the brown sugar and the remaining zest. Bring to a boil, and boil until it has reduced to 1/3 of original liquid, about maybe 10 minutes. Remove the clove, reduce heat to low and let it simmer until the fish is ready.

It was almost sauce like when I started

Season the mahi with the salt, pepper and the remaining brown sugar.

Aside: how do you season something with brown sugar? It doesn't sprinkle lightly over the fish like salt or pepper. I tried to sprinkle it, got crumbs of sugar on it and then mashed it in.

Heat the remaining 1 Tbsp of oil in a skillet using medium high heat. Cook the fish until golden brown - about 5 minutes - and then flip and cook until it is done, about another 5 minutes.

When you flip the fish, turn the heat back up on the simmering sauce/relish/substance and return it to a boil. The author adds that if you like a thicker sauce, you can whisk in a half teaspoon of cornstarch and boil for 1 minute. If mine had gotten any thicker, it would have been an orange/onion cupcake, so I ignored the cornstarch. Another note says that you can add a Tbsp of butter to make it richer.

Here's the official Sauce/Relish/Substance

I served this with wilted spinach and Rice Pilau (recipe to come, I hope), then spooned the sauce/relish/substance over the top.


I loved everything about my plate. The Professor liked it fine, but finally decided the sauce/relish/substance was too "something" for him. I'm guessing the ginger was too concentrated for him, but I absolutely loved it.

Friday, January 15, 2010

Experiment: Cheese Crisps

I have a thing for cheese. It's genetic, really, but the end result is that I usually have about 5 kinds of cheese in my fridge. Since cheese = happiness, my fridge is almost heaven. If I kept all of the alcohol in one place, and put it all in the same fridge as my cheese, it WOULD be heaven and I would have to move in.

Right now, 3 of those cheeses are shredded. Not sure how that happened, but I don't ask for detailed history before I eat cheese, I just eat it. Except that a few nights ago, I had memories of these awesome Parmesan cheese crisps I made to go with a butternut squash soup once upon a time. And suddenly that was nothing more important than ANYthing in the world. I must have cheese crisps!

Since I couldn't decide which cheese to use, I went with a variety pack: a couple of Parmesan, a few Mozzarella, and a few "taco blend". The Parmesan ended being my least favorite, so I made some bigger ones of the other flavors and munched happily on cheese for awhile. And then the happiness was inside me and I didn't have to move in the fridge, and we (the cheese & me) lived happily ever after. Amen.

Cheese Crisps.

Ingredient:
Shredded Cheese

Get your oven up to 400.

Make small mounds of shredded cheese.


Bake until it's completely melted and has been bubbling along and starting to get dark.

These are not done:


These are:


Blot up the grease and then forget that you had to do that, because you just made your cheese better for you by cooking out the grease!

Let cool on a rack, or drape over a rolling pin to get perfect cups for dipping.

Next time these babies will be filled with some guacamole

Wednesday, January 13, 2010

Chicken Capri

Ricotta cheese...I could eat it by the spoonful. Throw a few herbs and some pepper in it, and it's a great celery dip. Slather it on anything, and "anything" just got 642% better tasting. Just get a spoon, and it's better than eating peanut butter out of the jar (mostly because peanut butter is DISGUSTING, moving on).

So chicken + tomatoes + cheese makes my stomach very happy. Plus, the leftovers are good for lunch the next day. It's a lazy blogger's dream come true!

Did I mention it's relatively healthy? Ok, you can forget I said that if you want, if that will make it taste better. Deception often makes my stomach happy. Like when I bite into a lentil dish at the Indian lunch buffet, only to discover that it's actually peas, and I have to curse myself because I was too impatient to take the time to read the labels above the food. Which is why I also burned my tongue when this came out of the oven (because of the impatience, not the peas, you can keep up if you try).

Chicken Capri

2 chicken breasts, sliced in half horizontally
1 Tbsp extra virgin olive oil
garlic powder, to taste
1/4 cup ricotta cheese
2 tablespoons Parmesan cheese (grated or shredded)
1/2 tsp oregano
fresh ground pepper, to taste
4 tablespoons diced tomatoes
4 slices Mozzarella cheese (except that I was out and used Muenster)

Heat olive oil in a skillet large enough to hold your chicken breasts. Add the chicken to the pan and season with garlic powder. Cook for a bout 5-6 minutes on each side, until they're just browning.


Aside: I picked up the trick of cutting the chicken breasts like this from my sister; I used to just hack them in half, but slicing them like this makes dinner-cooking go much faster.

Back to recipe-izing.

Preheat your oven to 350.

Mash (yes, mash, don't just mix) the ricotta, Parmesan, oregano and pepper together.


When the chicken breasts are ready, put them in a shallow casserole - I used my 11x7 pan and it was the perfect size.

Top each breast half with 1/4 of the ricotta mixture and spread out a little.


Top each piece with 1 Tbsp diced tomatoes - I used fire-roasted, because, really, have you tasted fire roasted tomatoes?


Bake for 10 minutes.

Top each piece with 1 slice of cheese.


Bake for about 5-6 minutes or until the cheese is melty and delicious and will burn the ever loving heck out of your tongue because you're too impatient to wait.

Tuesday, December 29, 2009

The Most Perfectest Cheesecake Ever in the History of Evermore

I’ve done it y’all. I’ve made a perfect cheesecake and been warned against changing the slightest thing.

At the first suggestion that I might play around with my new cheesecake recipe, one sister said “No” in a tone of voice that brooked no arguments. From anyone.

At the second suggestion (who am I to listen to my big sister all the time?), my dad said “it’s perfect as it is”. Now, since my dad has never told me I made any food perfectly in my life, I just might go to my grave without ever changing one milligram of an ingredient. I’m wishing I had temped the ingredients and written down the relative humidity the day that I baked the damn thing, because now I’m worried I’ll never recreate The Most Perfectest Cheesecake Ever. What happens if I can only make it in the winter, when the temperature and humidity are both below 70? That’s only, like, 2 months of the year around here! I could die if I don’t have cheesecake before then, and then where would my family be? They’d be left with just a memory, that’s what. Well, and the recipe so they can make it themselves. Maybe this cooking blog was a better idea than I realized.

Anyway, perfection comes with a price. In this case, that price is your general health. Since, I’ll be the first to sacrifice my health and longevity for a piece of cheesecake, don’t feel tempted to eat any yourself – I can take care of the whole thing. You and your arteries are welcome.

The morning after Christmas, the grocery section at Wal-Mart was out of anything but the full-fat cream cheese. Ditto on sour cream. I haven’t calculated the fat grams, and if you do, keep it to yourself, because those numbers are not welcome here.

As for the first ingredient: that is most assuredly NOT a typo. There are FORTY ounces – yes, FORTY (sorry, I can’t say that without yelling) ounces of cream cheese in this sucker.


The Most Perfectest Cheesecake Ever,
(stolen shamelessly from Recipezaar’s Bird- I added a crust, but that’s it, see the notes below for my nervousness while cooking).

Ingredients
Crust:
  • 2 ½ cups graham cracker crumbs and/or vanilla wafer crumbs (I used a combo this time)
  • 2 Tbsp sugar
  • 1 stick butter, melted
Filling:
  • 40 ( FORTY) oz cream cheese (5 8oz blocks), softened
  • 1 ½ cups sugar (no Splenda this time, I went for broke)
  • 16 oz sour cream
  • 2 eggs
  • 1 Tbsp lemon juice
  • 1 tsp vanilla
  • 1/2 tsp salt

Directions:

Preheat your oven to 375. The directions say to line the bottom of your spring form pan, but I made a crust and didn’t do that.

Lightly spray the bottom & sides of a 10” spring form pan with non stick butter-flavored spray.

Mix crumbs and sugar together in the pan. Make a well in the center and pour in melted butter.

Use a fork to toss and combine. Use a piece of wax paper to press the mixture onto the bottom and about one half inch up the sides of the pan.

Bake for 5 minutes – it will not be completely done. Put it in the freezer while you mix up the batter.

Now it gets serious.

I whipped up one block of cream cheese in my stand mixer, then added some sugar and whipped for a minute. Then I alternated the cream cheese and sugar until all of both were added, ending with sugar. I don’t know if it made a difference (the alternate choice being to dump in all the cream cheese and sugar at once), but dude – I’m not taking any chances of doing this differently. Scrape down the sides of the pan constantly while you’re mixing.

Add the sour cream and mix until thoroughly combined. Scrape down the sides while you’re mixing.

Add the eggs one at a time, mixing well after each. Scrape down the sides while you’re mixing.

Add lemon juice, vanilla and salt. Scrape down the…you got it now, right?

Pour the batter into the spring form pan and lightly drop it a half inch or so on the counter to force up the air bubbles. Do this about 10 times, turning slightly between each “drop”.

Place the cheesecake in a pan large enough to use as a hot water bath. Put the pan in the oven, and pour enough water in the pan to come up about an inch.

Bake for 30 minutes at 375, then reduce the temperature to 250 and bake for 2 (yes, TWO) more hours. Do not open the oven to check on it!

Remove from the oven and cool for about 45 minutes.

Put the cheesecake in the fridge and refrigerate for at least for hours, or overnight.

This sucker needs no topping, but if you must, I can’t stop you!

Notes:

This is not a cheesecake to be made on a whim. I barely planned ahead, and I had just enough time to squeeze this out and get it in the fridge 4 hours before dinner. I’ll plan on making it a day ahead next time, or at least first thing in the morning.

When I took the cheesecake out of the oven, it was still pretty jiggly in the center. I was worried it would run all over the place, but it set up beautifully in the fridge.

Despite the fact that it has a whopping FORTY ounces of cream cheese, this was absolutely the lightest, fluffiest cheesecake I have ever made. I can’t explain, I can’t tell you why. Fools give you reasons, wise men never try. Or something like that. Wait, that song was about love, not cheesecake? Well, I say cheesecake IS love.

Sunday, December 6, 2009

Dark Chocolate-Espresso-Hazelnut (or Not) Chewies: A New Reason for Living

It's cookie baking season. That one special month when eating cookies is a requirement of happy living. Well, cookies or pies, but I baked cookies this weekend, so that's what we'll worry about. And I had my eye on these lovely bits of decadence, which of course means that I couldn't make such perfection without fracking up the ingredients.

So, first up: the chocolate. Measuring the chocolate in cups threw me - I usually go by ounces. I had a 3.5 ounce bar of 70% cocoa dark chocolate and a 4.4 oz bar of milk chocolate. I used all of the dark and half of the milk and called it a day.
Also, you know what is a most helpful ingredient when you want to bake cookies?

Sugar.

Yes, dear ones, I didn't check my baking cabinet before I started melting the chocolate, confident that the 5 pound bag of sugar I imagined in my head would be there.

Imagine my surprise when it wasn't. So I substituted Splenda and called it another day.

Also? Had to use decaf because The Professor has a definite reaction to caffeinated coffee - it's called "The Heart Bursting Problem" around here.

Then there's the fact that I'm not a huge fan of nuts in cookies. If they're good enough, I'll deal with it. So I made a few cookies before I mixed in the nuts - which was convenient because I only had 1/2 cup of chopped nuts - and I used macadamia instead of hazel because apparently the Big Brains at the grocery store (read: Wal-Mart) don't think anyone around here would be interested in hazelnuts.

And Holy Chocolate, Batman, these cookies were good! One of the top 5 of all time, for sure The batter was good, the cookies - even the ones with nuts! - are good, the rum-spiked eggnog was good...

The majority of these were destined to go home with The Bestest Friend. Next time: no nuts at all. They just interrupt all the chocolate goodness.

I only got 12 good-sized cookies out of this (I probably could have gotten 2 more out of the remaining batter, but I didn't want to dirty another pan and The Professor wanted to eat the batter, not the cookies, and I do try to make him happy every once in a while - which is what led to his heart going into sugar-overload making him think he was having a heart attack, which means I might kill him one day by making him happy. Maybe I should stop doing that?).
Anyway - I don't need 40 cookies laying around calling my name at 2 AM.


Not that they ever have or anything. Cause that would just be weird.


Dark Chocolate-Espresso-Hazelnut Chewies
1 3/4 c. dark chocolate of your choice
4 tbsp. unsalted butter
2 eggs
1/2 c. + 2 tbsp. sugar
2 tsp. espresso grounds
1/4 c. AP flour
1/4 tsp. baking powder
pinch of salt
3/4 toasted chopped nuts. I like the hazel, but you can mix it up.


Bonus points for this being super-easy to put together:

Melt some chocolate:


Mix it into some other ingredients, and add some nuts:


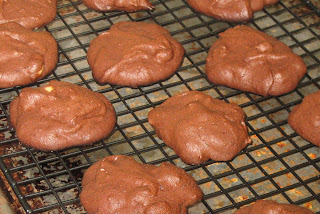
Spoon, bake, cool:


And finally - eat.