Tuesday, December 29, 2009

The Most Perfectest Cheesecake Ever in the History of Evermore

I’ve done it y’all. I’ve made a perfect cheesecake and been warned against changing the slightest thing.

At the first suggestion that I might play around with my new cheesecake recipe, one sister said “No” in a tone of voice that brooked no arguments. From anyone.

At the second suggestion (who am I to listen to my big sister all the time?), my dad said “it’s perfect as it is”. Now, since my dad has never told me I made any food perfectly in my life, I just might go to my grave without ever changing one milligram of an ingredient. I’m wishing I had temped the ingredients and written down the relative humidity the day that I baked the damn thing, because now I’m worried I’ll never recreate The Most Perfectest Cheesecake Ever. What happens if I can only make it in the winter, when the temperature and humidity are both below 70? That’s only, like, 2 months of the year around here! I could die if I don’t have cheesecake before then, and then where would my family be? They’d be left with just a memory, that’s what. Well, and the recipe so they can make it themselves. Maybe this cooking blog was a better idea than I realized.

Anyway, perfection comes with a price. In this case, that price is your general health. Since, I’ll be the first to sacrifice my health and longevity for a piece of cheesecake, don’t feel tempted to eat any yourself – I can take care of the whole thing. You and your arteries are welcome.

The morning after Christmas, the grocery section at Wal-Mart was out of anything but the full-fat cream cheese. Ditto on sour cream. I haven’t calculated the fat grams, and if you do, keep it to yourself, because those numbers are not welcome here.

As for the first ingredient: that is most assuredly NOT a typo. There are FORTY ounces – yes, FORTY (sorry, I can’t say that without yelling) ounces of cream cheese in this sucker.


The Most Perfectest Cheesecake Ever,
(stolen shamelessly from Recipezaar’s Bird- I added a crust, but that’s it, see the notes below for my nervousness while cooking).

Ingredients
Crust:
  • 2 ½ cups graham cracker crumbs and/or vanilla wafer crumbs (I used a combo this time)
  • 2 Tbsp sugar
  • 1 stick butter, melted
Filling:
  • 40 ( FORTY) oz cream cheese (5 8oz blocks), softened
  • 1 ½ cups sugar (no Splenda this time, I went for broke)
  • 16 oz sour cream
  • 2 eggs
  • 1 Tbsp lemon juice
  • 1 tsp vanilla
  • 1/2 tsp salt

Directions:

Preheat your oven to 375. The directions say to line the bottom of your spring form pan, but I made a crust and didn’t do that.

Lightly spray the bottom & sides of a 10” spring form pan with non stick butter-flavored spray.

Mix crumbs and sugar together in the pan. Make a well in the center and pour in melted butter.

Use a fork to toss and combine. Use a piece of wax paper to press the mixture onto the bottom and about one half inch up the sides of the pan.

Bake for 5 minutes – it will not be completely done. Put it in the freezer while you mix up the batter.

Now it gets serious.

I whipped up one block of cream cheese in my stand mixer, then added some sugar and whipped for a minute. Then I alternated the cream cheese and sugar until all of both were added, ending with sugar. I don’t know if it made a difference (the alternate choice being to dump in all the cream cheese and sugar at once), but dude – I’m not taking any chances of doing this differently. Scrape down the sides of the pan constantly while you’re mixing.

Add the sour cream and mix until thoroughly combined. Scrape down the sides while you’re mixing.

Add the eggs one at a time, mixing well after each. Scrape down the sides while you’re mixing.

Add lemon juice, vanilla and salt. Scrape down the…you got it now, right?

Pour the batter into the spring form pan and lightly drop it a half inch or so on the counter to force up the air bubbles. Do this about 10 times, turning slightly between each “drop”.

Place the cheesecake in a pan large enough to use as a hot water bath. Put the pan in the oven, and pour enough water in the pan to come up about an inch.

Bake for 30 minutes at 375, then reduce the temperature to 250 and bake for 2 (yes, TWO) more hours. Do not open the oven to check on it!

Remove from the oven and cool for about 45 minutes.

Put the cheesecake in the fridge and refrigerate for at least for hours, or overnight.

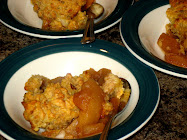
This sucker needs no topping, but if you must, I can’t stop you!

Notes:

This is not a cheesecake to be made on a whim. I barely planned ahead, and I had just enough time to squeeze this out and get it in the fridge 4 hours before dinner. I’ll plan on making it a day ahead next time, or at least first thing in the morning.

When I took the cheesecake out of the oven, it was still pretty jiggly in the center. I was worried it would run all over the place, but it set up beautifully in the fridge.

Despite the fact that it has a whopping FORTY ounces of cream cheese, this was absolutely the lightest, fluffiest cheesecake I have ever made. I can’t explain, I can’t tell you why. Fools give you reasons, wise men never try. Or something like that. Wait, that song was about love, not cheesecake? Well, I say cheesecake IS love.

Sunday, December 6, 2009

Dark Chocolate-Espresso-Hazelnut (or Not) Chewies: A New Reason for Living

It's cookie baking season. That one special month when eating cookies is a requirement of happy living. Well, cookies or pies, but I baked cookies this weekend, so that's what we'll worry about. And I had my eye on these lovely bits of decadence, which of course means that I couldn't make such perfection without fracking up the ingredients.

So, first up: the chocolate. Measuring the chocolate in cups threw me - I usually go by ounces. I had a 3.5 ounce bar of 70% cocoa dark chocolate and a 4.4 oz bar of milk chocolate. I used all of the dark and half of the milk and called it a day.

Also, you know what is a most helpful ingredient when you want to bake cookies?

Sugar.

Yes, dear ones, I didn't check my baking cabinet before I started melting the chocolate, confident that the 5 pound bag of sugar I imagined in my head would be there.

Imagine my surprise when it wasn't. So I substituted Splenda and called it another day.

Also? Had to use decaf because The Professor has a definite reaction to caffeinated coffee - it's called "The Heart Bursting Problem" around here.

Then there's the fact that I'm not a huge fan of nuts in cookies. If they're good enough, I'll deal with it. So I made a few cookies before I mixed in the nuts - which was convenient because I only had 1/2 cup of chopped nuts - and I used macadamia instead of hazel because apparently the Big Brains at the grocery store (read: Wal-Mart) don't think anyone around here would be interested in hazelnuts.

And Holy Chocolate, Batman, these cookies were good! One of the top 5 of all time, for sure The batter was good, the cookies - even the ones with nuts! - are good, the rum-spiked eggnog was good...

The majority of these were destined to go home with The Bestest Friend. Next time: no nuts at all. They just interrupt all the chocolate goodness.

I only got 12 good-sized cookies out of this (I probably could have gotten 2 more out of the remaining batter, but I didn't want to dirty another pan and The Professor wanted to eat the batter, not the cookies, and I do try to make him happy every once in a while - which is what led to his heart going into sugar-overload making him think he was having a heart attack, which means I might kill him one day by making him happy. Maybe I should stop doing that?).
Anyway - I don't need 40 cookies laying around calling my name at 2 AM.


Not that they ever have or anything. Cause that would just be weird.


Dark Chocolate-Espresso-Hazelnut Chewies
1 3/4 c. dark chocolate of your choice
4 tbsp. unsalted butter
2 eggs
1/2 c. + 2 tbsp. sugar
2 tsp. espresso grounds
1/4 c. AP flour
1/4 tsp. baking powder
pinch of salt
3/4 toasted chopped nuts. I like the hazel, but you can mix it up.


Bonus points for this being super-easy to put together:

Melt some chocolate:


Mix it into some other ingredients, and add some nuts:


Spoon, bake, cool:


And finally - eat.


Wednesday, November 18, 2009

Saffron Chicken and Rice

Saffron. The most expensive spice in the world. I purchased my first little bit of extravagance a few months ago. The only thing I’ve ever cooked with saffron is bouillabaisse* – which I love and adore, but I haven’t been up to making it with reams of frozen seafood, much less trying to equal the taste of my sister’s dish.

*Where “cooked” = “drinking any kind of alcohol while my sister tends the pot".

So, having no clue what I wanted to cook with it, I told myself I’d look around and see what struck my fancy.

Apparently what struck my fancy was to put it in my newly-reorganized spice cabinet and forget all about it. Occasionally I’d remember as I shoved it out of the way to get to the red pepper flakes or the basil – I had left it in front of the cabinet so that it wouldn’t get lost. Genius, you have met your match.

Except for the fact that I still managed to forget about it.

Tonight’s menu was chicken and rice, and I relentlessly pawed through my spice cabinet looking for just the right flavors. I think I must have shoved the saffron out of the way at least 3 times before it leapt up, grabbed my by the eyeballs and threatened me with dismemberment.

I took the hint, Thank Goodness, because this is the best flavored chicken and rice I’ve ever made. Take that, Genius!
 
This is where a picture would be, if I hadn't let all my batteries go dead. I did, and there isn't. So just imagine a slightly smoky red (how many adjectives can I use for one dish?) skillet of chicken and rice. And a Very Happy Professor.

Saffron Chicken and Rice
  • 1 Tbsp olive oil
  • 1 lb chicken breasts
  • 1 onion, diced
  • 1 clove garlic, minced
  • ½ tsp sweet paprika
  • ¾ cup rice
  • 1 ½ cups veggie broth (or chicken broth, white wine, water or any combination of the above)
  • A pinch of saffron threads

Heat olive oil in a skillet, and brown chicken on both sides. Remove from the pan.
Sauté onion and garlic in the skillet for about 3 minutes, until the onion softens.
Add paprika and stir til it’s all coated.
Add rice and stock to the pan. Bring to a boil.
Sprinkle in the saffron and return the chicken peaces.
Simmer, covered, for 15-20 minutes or until chicken is done.
I was so excited about this that I didn't even cook vegetables with it. Come to think of it, some green beans or snow peas stirred in for the last 5 or 6 minutes would have been awesome. Or Broccoli, maybe, if you're into That Kind Of Thing. Whatever - it was awesome.

Sunday, November 1, 2009

Sour Cream Chocolate Chip Cookie Bars

We went to have lunch with my Stepson today, and I really wanted to bake him some cookies. Male + 18 years old = ALWAYS STARVING, so I can indulge baking yearnings and then he eats {almost} all the calories for me. It's a good relationship angle.

But last night was Halloween (party + bonfire = late night), and I forgot to pull butter out to soften overnight. So I hunted around for a non-butter-using chocolate chip cookie recipe. Success! It even has 4 stars on RecipeZaar.

So I started happily mixing. And the problems began with ingredient #2: salad oil. Salad oil? Oil in salad is gross, and I usually serve EVOO for those who need it. I bake cakes with vegetable oil, so that's what I chose.

Problem #2: I started running out of ingredients. It's like I forgot what was in my baking cabinet. I had less than 2 cups of sugar, and had to sub a half cup of Splenda. I only had 3 eggs, and subbed...nothing (but I did end up using a half cup less flour, since I've made enough cookies to judge the right consistency). I ran out of white flour, and had to use a cup of whole wheat. I only had fat-free sour cream (full fat was recommended in a comment or 2).

But I am stubborn, and I wanted to make cookies!

When I got the batter mixed, I did a test tray of 6 cookies. And then while they baked I looked at my bowl of batter and realized I was in for a lot of teaspoon drops. So I did the smartest thing I did all day: I pulled out my 13x9 inch pan and my 11x7 inch pan, coated them with spray, filled them with batter and stuck them in the oven. A pan for the Stepson, a pan for the Bestest Friend, 6 cookies for me, and The Professor got to lick the bowl and spatula. Perfect.

While I was cleaning the kitchen, I found 2 sticks of butter flavored Crisco in the baking cabinet.

I'm going to put the original recipe from Pennie42 at RecipeZaar below because I'm fairly certain some weird kind of karma was watching over my baking this morning...


Ingredients

Directions

  1. Combine sour cream, salad oil, white sugar and brown sugar. Mix well.
  2. Add beaten eggs and vanilla.
  3. Mix baking soda and salt into some of the flour.
  4. Add this flour mixture to wet ingredients.
  5. Then add remainder of flour, a cup at a time.
  6. Blend thoroughly after each addition.
  7. Drop by teaspoon onto a greased cookie sheet.
  8. Bake in a preheated 350 degree oven for 8-10 minutes.
I baked my bars at 350 degrees for about 45 minutes. Somehow, the 13x9 and 11x7 pans got done at the same time - they were equally browned and equally done. Kitchen Karma for the Good, this time.

Sour Cream Chocolate Chip

Sunday, September 13, 2009

Shrimp in Tomato Basil Cream Sauce

Most of the time when I start making a dish like this, I think "Oh, I'll cook some pasta, and the sauce can cook that fast...dinner will be done in 15 minutes!" So I tell The Professor to go ahead and open up a bottle of wine, food will be here in a jiffy.

HAHAHAHAHA! I am incapable of cooking anything more complicated than a grilled cheese sandwich in less than 37 minutes.

Tonight, the sauce took a lot longer to reduce than I expected. So while I actually planned for the whole thing to take 30-40 minutes, it ended up being close to a bottle of wine an hour before dinner was ready.


This week Presto Pasta Nights is at The Sweet Kitchen!

Shrimp in Tomato Basil Cream Sauce

  • Approximately 6.625 ounces of whole wheat fuseli, cooked (the cork screws)*
  • 1 Tbsp extra virgin olive oil
  • 1 small yellow onion
  • 4 cloves garlic
  • 8 oz can of tomato sauce
  • cups vegetable broth (I'd reduce this to 1 cup next time)
  • 1 bay leaf
  • ½ cup grated Asiago cheese
  • ½ tsp red pepper flakes
  • 1 cup half & half
  • 1/2 pound baby shrimp
  • 5-6 basil leaves, roughly chopped

The box of pasta is 13.25 ounces, and I used half the box, hence the funky measurement.

Sauté onion & garlic in olive oil until onion is transparent, about 5 minutes.

Add tomato sauce, vegetable broth, bay leaf, and red peper flakes. Simmer for 30-40 minutes, or until reduced by half. Remove the bay leaf.

Whisk in the cream and grated cheese and return to a slow simmer for 5 minutes.

Add the shrimp and basil, and cook for 2-3 minutes, or until the shrimp are done.

Toss the pasta with the sauce and serve with some bread to soak up the sauce.

Saturday, August 29, 2009

Chicken Tikka Masala

Indian food is my new addiction. I've always liked it, but there's now a restaurant much, much closer to my house. The Professor and I have been there 4 times in the past month - putting it ahead of my beloved local Margarita Makers.

And last year, my bis sis found herself in an Indian restaurant for the first time and called to ask what she should order. I don't remember much of the conversation (I was at a party and the wine was flowing), but I *do* remember what dish she had - Chicken Tikka Masala - because she couldn't stop talking about it.

Since it's also one of my favorites, we decided to try and make it while I vacationed at her place a couple of weeks ago (necessitating a trip to my favorite spice store). It was good - really good - so I tried it again this weekend, and Holy Spices, Batman am I getting close to a great recipe.

The major sticking point in my house is the heat level: We all know by now that The Professor doesn't like spicy foods; he does, however, love Indian food and is usually willing to over look a lot of heat. This time, I went a tad too far for him - although I thought it was dang near perfect. I solved this crisis of opinion by putting the yogurt next to his plate, letting him mix in more as he needed.

My next hurdle with this: I want to make it with lamb.

I started with this recipe from Tigers & Strawberries, and now I know to try more of her recipes in the future.

I made this with whole spices, but I think a good rule for using ground spices is: 1 Tbsp whole = 1 tsp ground.
This also makes about 6 servings - perfect for us, because the leftovers taste better than the original!


Chicken Tikka Masala

2 small onions
5 cloves garlic, finely minced
Seeds from 10 cardamom pods
1 tsp peppercorns
2 Tbsp coriander seeds
1 Tbsp whole cumin
2 tsp red pepper flakes
1 Tbsp paprika
4 Tbsp butter, divided
2 tsp ground ginger
1 tsp garam masala (optional, but I love it)
1 tbsp sweet paprika
14 oz can diced tomatoes
1/2 cup yogurt
3/4 cup half & half
1-1/12 lbs chicken breasts, cut into 1 inch pieces

First, make your spice blend: Put the cardamom seeds, peppercorns, coriander seeds, cumin and pepper flakes in a spice grinder and ... grind. Take a deep breath and enjoy the aroma that will soon be wafting through your kitchen. You can almost smell the picture:


Melt 2 Tbsp butter in a large skillet. Saute onions until they begin to caramelize.

Add garlic and cook for another 2-3 minutes.

Add your spice blend, ginger, garam masala (if using) and paprika.


Stir everything together until it's well combined. Take a deep breath. Or five. Let it all mix together in the skillet for a few minutes.

Add tomatoes and water and stir everything together. Turn your heat down and simmer for about 10-15 minutes - it will thicken up a little and reduce.


Whisk the yogurt into the sauce, then add the remaining 2 Tbsp of butter and the half and half, and whisk everything together.

When the sauce is simmering again, add the chicken pieces and let it simmer until they are completely cooked.(about 10 minutes).


Serve over rice, hopefully with some kind of bread to sop up all the sauce.

Thursday, August 27, 2009

Sesame Noodle Salad

The Professor has another Department Event tomorrow night. BBQ from a local place is being provided, but we're all bringing side dishes or desserts to add to the Festive Atmosphere - that will likely be rained upon as we sit in a public park. All I can say is, thank god this has been an unusually cool August.

I've seen plenty of Chinese Noodle recipes that call for peanut butter, but the thought of mixing sacred carbs with that substance makes my stomach revolt. But tahini is almost the same thing - made of sesame seeds instead of peanuts - and I will actually eat that stuff. Which is good, because if NO ONE ate my dish, I'd be mightily upset.

I didn't so much "measure" anything because I basically "flung them with wild abandon". So the dressing ingredients can easily be adjusted for your taste. (See the notes at the bottom for more info).

Sesame Noodle Salad

8 oz spaghetti noodles
1 yellow bell pepper, finely diced
bunch green onions, chopped (mine was 5.5 ounces, and I chopped almost half the way up the stalks)
1 cup Shredded Carrots, chopped a little
1/2 cup tahini
1 tsp sesame oil
2 tsp soy sauce
1 Tbsp honey
1//2 - 1 tsp red dried red pepper flakes
1 tsp garlic granules
1 tsp ground ginger
2 tsp sesame seeds
Terriyaki sauce (optional)

Cook spaghetti noodles as directed on package.

To make the dressing: Mix the tahini up in the container - since it's most probably separated. Add 1/2 cup to a food chopper (or do to a bowl, and do the rest by hand). Add sesame oil, soy sauce, honey, pepper flakes, garlic, & ginger. Thoroughly combine.


I put the white parts of the green onion into the strainer that I used to strain my pasta - that way, they get just the tiniest bit cooked when you pour the hot pasta & water over them.


After you drain the pasta, toss it (and the onion parts) with a tablespoon or two of terriyaki sauce. I did this because I wasn't ready to combine everything and I didn't want the noodles to lump together.

Toast the sesame seeds in a skillet over low heat for 2-3 minutes.

Put the chopped bell pepper, carrots and green parts of the green onions in a large bowl.


Add the drained noodles.


Pour the dressing over, and toss (tongs are great here) to thoroughly combine.

Add the sesame seeds and toss a few more times.


Refrigerate and serve cold.


Notes:
The onion taste was too strong for me. The Professor didn't seem to notice; I'm just not a fan of raw onion.

I couldn't taste the red pepper at ALL. I would at least double this - and probably more - next time.

The dressing - after I got past the onions - was VERY YUMMY. I tasted it before I tossed the pasta/veggies with it, and loved the taste, so I think we can assume that I will be trying something like this again.

Wednesday, August 5, 2009

Not Really Swordfish Spiedini : Grilled Swordfish & Zucchini

One of the deficiencies of living in My Little Corner of The South is that I'm too far from fresh seafood to buy it, unless I want to drive for 45 minutes up to The Big City and spend half of my weekly food budget on a couple of pounds of fish. So when Publix had a "sale"* on "fresh, never frozen" swordfish a couple of weeks ago, I had to jump on it. Kind of like how sales of porn go up in hotels during conservative conventions.

Maybe that was a bad comparison? Do you think I'm going to just leave that alone for the rest of this post?

*I say "sale" because it's still more than I like to spend on my proteins, but this was a bargain for seafood 'round these here parts.

But then life got in the way, so it ended up getting frozen after all - in my freezer. Simple grilled swordfish steaks weren't in my future after all.

But then I found a recipe from the Queen of Food Porn* for grilled swordfish, and decided that would do nicely for someone needing a quick fix. Except, buying pancetta in my corner of the world is - again - more than I want to spend, and Publix didn't have any obliging sales. So I just left it off, like a Porn Star might "forget" to wear underwear for a shoot.

*Giada De Laurentiis. Do I really need close-up shots of her taking a bite of a chocolate covered strawberry with cheesy music playing in the background? I get it, she's hot, but: Short answer: NO.

So this was our dinner this evening: Not Quite Swordfish Spiedini with Zucchini Thrown in Just Because.

And? It was spectacular. My only sorrow is that fish really doesn't reheat well at all, so we had to eat it all tonight - which isn't really a sorrow now that I come to think of it, more like how (apparently) a conservative convention would react to a free-porn-night in their hotel bedroom.

And I think I may have talked about porn enough to give my mother a headache. Sorry, Ma. The fish was just that awesome.

Not Really Swordfish Spiedini with Zucchini

1 lb swordfish steaks, cut into 1 inch cubes
2 large zucchini, cut in 1-ish inch slices
3 Tbsp extra virgin olive oil
3/4 tsp dried basil
3/4 tsp dried savory
3/4 tsp dried thyme
3/4 tsp dried oregano
Fresh ground pepper, to taste
dash of salt

If you happen to have NOT left your metal skewers at your best friends house 8 months ago and forgotten to retrieve them since, then use them. Otherwise: Set 3 wooden skewers to soak in water for 30 minutes.

Cut up your swordfish and Zucchini.


Mix the olive oil, herbs and seasonings in a bowl.


Add the swordfish and zucchini and marinate for the remainder of the 30 minutes.


Alternating swordfish with zucchini, skewer the suckers and reserve the marinade.


Heat a gas grill (or broiler).

Grill (or broil) skewers for about 8-10 minutes, turning every couple of minutes and basting with reserved marinade. Make sure to cook for a couple of minutes after you baste them the last time.

I had more fish than would fit on the skewers, so I just grilled them separately - because who's gonna complain about extra fish?

You could serve this over rice if you feel the need. Or maybe toss them with some pasta, butter and parmesan...that sound great now that I think about it. Since The Professor had a quarter of a watermelon waiting for dessert, he didn't want to get too full.

These things were AWESOME. I cooked them on high, and the swordfish and zucchini got a slight char that was delicious, while the fish remained wonderfully moist inside. This may be the first time I haven't dried out any fish but salmon on a grill. Marinades are the key, I've found.

Monday, August 3, 2009

WHY YES, I AM YELLING

MY LIFE WILL NOT BE COMPLETE UNTIL I EAT THIS:

--pic from Michelle of Thursday Night Smackdown, The Goddess Who Made This Life-Giving Substance.


Chocolate Mousse

Monday, July 20, 2009

Spaghetti Squash Casserole

Spaghetti squash is one vegetable-type-substance that I can get The Professor to eat with wild abandon. Possibly because it has the word "spaghetti" in it, but that's neither here nor there: I'm getting him to eat a vegetable! Let me enjoy my triumph.

The added benefit of this meal is that there's no meat. But we almost didn't miss it. Ok, ok, he might have made one comment along the lines of "This would be great with some meat in it", but I really think that's just habit at this point; his way of making sure I'm not going to turn into a vegetarian. As if that could happen while there is still lamb and bacon in this world!

This is another "throw together whatever is languishing in my vegetable drawer" type of dish, which makes it very non-stressful. Which is also something I actively seek out in my life.

And when all was said and done, I was the one who opined "This would be three times more awesome with some Italian sausage".

Spaghetti Squash Casserole

  • 1 spaghetti squash
  • 2 small yellow onions (or 1 large), diced
  • 1/2 red bell pepper, diced
  • 2 zucchini, cut up
  • 8 oz button mushrooms, cut up
  • 4 cloves garlic, minced
  • 1 14 oz can diced tomatoes, drained (I highly recommend the Muir Glen Fire Roasted No Salt Added variety)
  • Basil and/or Oregano and/or Thyme - as much as you like. I used all 3
  • 1/2 cup+ shredded mozzarella cheese (I wanted Parmesan, but was out!??)

Cut the spaghetti squash in half and remove the pulp and seeds. Put it in a dish and microwave for 25 minutes (or until it's done).

While that's cooking, cut up your veggies.

Yes, I know the mushrooms are missing.


In a large - and I mean large - skillet, heat about a tbsp of olive oil. Saute the onions over medium heat for about 5 minutes, until they're transparent.

Add the rest of the veggies and the garlic, stir them around and then let them be while you deal with the squash.
Mmmmm....garlic...Can you smell it too?


When the squash is done, remove the strands with a fork. I just put them back in the same casserole I had cooked them in (after I removed the water).

This was a small squash, but it still covered the bottom of the dish.


Move the veggies around a few times to make sure they're cooking evenly. I sauteed them for about 17 minutes.


Add the can of drained tomatoes and herbs and stir it all up. Cook for about 2-3 minutes.

Yes, the steam gets in the way of good photos.


Add the veggies to the squash and mix gently (the veggies are pretty soft by this point).

Almost there...


Sprinkle the shredded cheese on top and pop under the broiler for about 5 minutes.

Melted Cheese. How my heart sings.

So, lessons learned:
  1. Parmesan would have been much better than Mozzarella, but at least I had cheese.
  2. I must try this again with Italian Sausage. The thought is now consuming my mind.

Monday, July 13, 2009

Garlic-Lemon-Butter Shrimp & Mushrooms

I think that the title of this post might just be enough of a recipe that I could leave now. But then what would be the point of having a blog?

Well, the point of this blog has been kinda absent the past couple of months. Not because I stopped eating (ha!), but because I stopped cooking and started grilling. And I haven't been able to stop. Chicken and zucchini, pork chops and mushrooms, Salmon and asparagus...if it's been in my kitchen lately, it went outside to the grill and came back already eaten.

But shrimp were on sale this week, and I have a hard time NOT burning the ever-loving shrimpiness out of shrimp when I grill them. So it was back to the kitchen for this one.

I was out of real butter, fresh garlic and lemons. So I used fake butter, garlic powder and some bottled juice. And it was SPECTACULAR. So, food snobs be damned, I made heaven in a bowl with "fake" ingredients.


And it was only when I got to the end of my bowl and slurped up the last of the buttery-lemony-garlicy sauce that I realized...this dish needs bread. A good chunk of it to soak up all those juices. The Professor was eating his over rice and when I mentioned that, he stopped cold, pointed a finger towards the kitchen and said "Go! Do it NOW!"

Since I was out of lemony-garlicy-buttery juice, I'll let you ponder if you think I went and did that.

But if I'm back in the kitchen in an hour, making a batch of Garlic-Lemon-Butter sauce...well, it's no one's fault but my own, because I think I may have a new addiction.

Garlic-Lemon-Butter Shrimp & Mushrooms

  • 1 lb 31-35 (or any large-ish) shrimp, peeled and de-veined
  • 8 oz button mushrooms, quartered (of just halved if they're small)
  • A bunch of globs of butter or a buttery-type substance (I used Country Crock)
  • Many, Many dashes of Garlic Powder
  • about 2 Tbsp of lemon juice
  • about 1 Tbsp dried basil


Glob a bunch of butter in a skillet over medium heat, and when it's about half melted, add the mushrooms. Shake about 1 tsp of garlic powder over the whole thing and stir it. Let the mushrooms cook for about 10 minutes - you want them to release their liquid, but not dry out.

In a small bowl, mix a couple more tablespoons (or just globs - there was no measuring tonight) of Buttery Stuff with another teaspoon or so of garlic powder and the dried basil.

Turn the heat up to medium-high.

Add the Buttery Stuff Mixture and the lemon juice to the skillet, then dump in the shrimp. I used my tongs to make sure they were all at the bottom of the skillet, and then turned them over when they started to turn pink.


When the shrimp is thoroughly pink, your dish is Done.


Serve over rice, or - if you want heaven in a bowl - just pour it in a bowl and serve with some nice thick bread to soak up the juices.

Saturday, May 2, 2009

Apple Custard Pie

You can tell when I have family visitng, can't you? It's when I start trying out stuff and posting about it. I admit, I've gotten lazy in my day-to-day life. Especially this spring. We bought a gas grill last fall, and for the past 3 weeks, I've been a grillin' fool. I still burn half of what I cook, but at least I'm using marinades so the char has a little sweet taste too it.

Speaking of sweet taste: This pie was awesome. I'd never even thought of an apple custard pie before, and then I ran across one at Recipezaar, and knew I had to try it. I think it may actually replace the Dutch Apple Pie for the foreseeable future for one simple reason: I used a graham cracker crust. That is so much easier than making pie dough!

The original recipe is here. Amazingly, I didn't change much, although I guess that's in the eye of the beholder.


Apple Custard Pie

Ingredients:

For graham cracker crust:
  • 1 1/2 cups graham cracker crumbs (I used Cinnamon Grahams this time)
  • 1/3 cup Splenda
  • 1/2 stick of butter, melted
For Pie:
  • 1/2 cup butter, divided
  • 2 Gala and 1 Granny Smith apples, peeled, cored and sliced
  • 1/4 cup Splenda (If I had used Splenda for baking, I would've cut it down to 1/8 cup)
  • 3/4 tsp ground cinnamon, divided
  • 1 cup sugar
  • 4 large eggs
  • 2 tablespoons all-purpose flour
  • 1ish tsp vanilla
  • 3/4 cup buttermilk
For streusel:
  • 3 Tbsp butter
  • 1/4 cup Splenda
  • 1/4 cup packed brown sugar
  • 1/2 cup all-purpose flour
Directions:

Preheat oven to 300F.

Crust: Mix cracker crumbs, Splenda and melted butter together and press into the bottom of a 9" pie pan. Bake for about 10 minutes.

Pie: Melt 1/4 cup butter in a skillet. Add apples, Splenda and cinnamon and cook for about 5-10 minutes (depending on how thick you sliced your apples) until soft but not mushy.


Butter...Sugar...They sing when they're together in my pans.

Beat 1/4 cup butter and 1 1/3 cups sugar at medium speed with an electric mixer until creamy.

Add eggs 1 at a time, beating just until incorporated.

Add 2 tbsp flour and vanilla and beat until blended.

Add buttermilk and beat until smooth.

Use a slotted spoon to spoon the apple sliced onto the pie crust (leaving behind the sugary-buttery syrup. I know. Sacrilege).

Pour the custard batter evenly over the apples.

Bake for 40 minutes.

I had sprinkled some cinnamon on when I was struck with the urge to just get a fork. Luckily for my family, I carried on with the recipe.

Mix together the streusel ingredients until crumbly. Mine? didn't get crumbly. It got creamy. I have no clue why. So I just dropped it by spoonfuls all over the top of the pie and baked it for another 30-40 minutes, until the top had melted and formed a top crust.

It doesn't look like much yet...but just wait til I cut this baby open.

Also? Because the combination of butter, sugar and cinnamon can't taste BAD. So it doesn't really matter if it looks perfect. Because the inside looks like this:


I was lucky enough to have one of the last two slices for breakfast. I may make it part of my daily diet.

Thursday, April 30, 2009

I Played A Trick On My Mom Last Night . A Tabbouleh Trick.

See, my dear mother isn’t one to be adventurous when it comes to ethnic foods. Give her a bratwurst dripping in sauerkraut, and she’s a happy German lady. Give her a choice of lamb korma or pad Thai, and she chooses a glass of water, with a cracker on the side. It’s one of my dad’s jokes that my mom isn’t particularly daring when it comes to other-country foods.

Still, I had two recipes that I thought she’d like, if not love. Souvlaki – a Greek dish – is just a fancy way to say “marinated meat”. Some olive oil, some lemon juice, a little oregano and garlic…a few pieces of chicken breasts and voila! I thought she'd enjoy that one.

But I was totally unprepared for her reaction to my not-quite-authentic couscous tabbouleh.

I didn’t try to scam this one past her. I told her straight up what the name of it was, and when she asked “what is it?” I may have left off the “Lebanese salad” part of the description and jumped right into a list of ingredients. See, I know a few things about what my mom likes to eat, and I really, really, had a good feeling that she’d like everything in this: A few raw veggies (including one of her beloved red bell peppers), a little lemon juice, a sprinkling of completely non-authentic Parmesan cheese. And how can you actually dislike couscous?

What completely blew me away, however, is that I watched her take thirds (and possibly fourths when my back was turned) of the tabbouleh. I bit my tongue. I wanted to burst out “But Mama! That’s a Mediterranean dish!” And finally, I couldn’t hold it in anymore. When she spooned up just a wee bit more of the stuff (And I will admit, it was dang good) on her plate, I had to tell her. I can’t trick my mom for long before I feel guilty.

My dad (who – like me – will eat just about anything that gets in his mouth) told me it was a good thing I hadn’t told her first. But now? I’m not so sure. My mom’s starting to rock out with the adventures these days.

Maybe tomorrow night I’ll fix that lamb korma after all.

And to make matters even more fun, my maternal experimentation is being thrown into the ring for Presto Pasta Nights. Double fun!


Couscous Tabbouleh

  • 1 box Parmesan flavored Couscous(I used Near East. I’ve never seen un-instant couscous around here)
  • 1-2 Tbsp extra virgin olive oil
  • 3-4 Tbsp lemon juice
  • 2 Roma Tomatoes, diced small
  • 2/3 of a large cucumber, diced small
  • ½ of a large red bell pepper, diced small
  • 4-5 scallions, finely copped
  • 2 oz pine nuts
  • ½ cup finely shredded Parmesan cheese
  • ½ cup chopped parsley

Directions

Cook couscous according to package directions. Then get busy chopping up your veggies.

Drizzle 1 Tbsp EVOO and 2-3 Tbsp lemon juice over the couscous and fluff with a fork.

Add your veggies, pine nuts and cheese, and fluff again.

Toss in your parsley.

Fluff-ernate again.

Now take a taste and add lemon juice, olive oil, salt and /or pepper as your heart desires.

Chill for at least 30 minutes. This stuff just gets better over time.

Tuesday, March 24, 2009

Update: Squash Casserole

Hey, remember this recipe? Squash Casserole?

This week, I was hit with inspiration. Inspiration in my new cure-for-all-ills: ricotta cheese. Lately, I have been addicted to the stuff. You wouldn't know that from my blog, but that's called "my real life".

This week, I decided to try another squash casserole. I wanted something that would hold together a little better than my last attempt. I decided I needed something a little more cohesion-building than sour cream - and the ricotta was just sitting there on my refrigerator shelf.

I think I have a winner here. The spice blend could be changed up in a quadrillion ways. Fresh herbs would be a wonderful substitute. I keep hoping McCormick's will send me a case of free seasoning, so I'm gonna blog about that option.

Squash Casserole

Ingredients:
Olive Oil cooking spray
1 pound yellow squash (4 small), cut small
1 yellow onion, diced
1 cup ricotta cheese
1/2 cup sour cream
1 tsp McCormick's Roasted Garlic & Herb blend
1 cup? Mozzarella cheese
1/2 cup Italian flavored bread crumbs

Preheat oven to 350F.

Spray a medium skillet with Olive Oil cooking spray. Put the squash and onion in the pan, and then spray them with it, too. "Spread the Spray" could be my new motto.

I think I put a little salt and fresh ground pepper in there too.

Cook about 10 minutes, until veggies are soft.
In a small bowl, mix the ricotta, sour cream and seasoning.

This is my new seasoning love:


And this is the yummy goodness that will hold the squash together:


Toss mixture with veggies.

Spray a 2 quart cooking dish with more of the "Spread the Spray" love. Pour in the squash mixture.


Hmmm...that needs something.

Look at the squash casserole, and decide it needs some more seasoning. I know! More Roasted Garlic and Herb Blend!

It'll look better in a little while. I promise.

Bake for 30 minutes.

Getting Warmer...

In a small bowl, mix together cheese and bread crumbs.

Mmmmm....cheese and bread crumbs...


Spread cheese-bread-crumbs mixture over casserole.


Bake for another 15 minutes, or until casserole is bubbling around the crust.

Ohh Baby
Portion out for your next 3 lunches before you inhale the whole delicious creation.